
The shared base
Roots and supporting stems supply the chosen varieties.
🚚 Free Shipping on First Order
🎁 TODAY SPECIAL OFFER: Order 2+. Use code GGG15 for 15% OFF
🚚 Free Shipping on First Order
🎁 TODAY SPECIAL OFFER: Order 2+. Use code GGG15 for 15% OFF
🚚 Free Shipping on First Order
🎁 TODAY SPECIAL OFFER: Order 2+. Use code GGG15 for 15% OFF
🚚 Free Shipping on First Order
🎁 TODAY SPECIAL OFFER: Order 2+. Use code GGG15 for 15% OFF
🚚 Free Shipping on First Order
🎁 TODAY SPECIAL OFFER: Order 2+. Use code GGG15 for 15% OFF
🚚 Free Shipping on First Order
🎁 TODAY SPECIAL OFFER: Order 2+. Use code GGG15 for 15% OFF
🚚 Free Shipping on First Order
🎁 TODAY SPECIAL OFFER: Order 2+. Use code GGG15 for 15% OFF
🚚 Free Shipping on First Order
🎁 TODAY SPECIAL OFFER: Order 2+. Use code GGG15 for 15% OFF
🚚 Free Shipping on First Order
🎁 TODAY SPECIAL OFFER: Order 2+. Use code GGG15 for 15% OFF
🚚 Free Shipping on First Order
🎁 TODAY SPECIAL OFFER: Order 2+. Use code GGG15 for 15% OFF
🚚 Free Shipping on First Order
🎁 TODAY SPECIAL OFFER: Order 2+. Use code GGG15 for 15% OFF
🚚 Free Shipping on First Order
🎁 TODAY SPECIAL OFFER: Order 2+. Use code GGG15 for 15% OFF
🚚 Free Shipping on First Order
🎁 TODAY SPECIAL OFFER: Order 2+. Use code GGG15 for 15% OFF
🚚 Free Shipping on First Order
🎁 TODAY SPECIAL OFFER: Order 2+. Use code GGG15 for 15% OFF
🚚 Free Shipping on First Order
🎁 TODAY SPECIAL OFFER: Order 2+. Use code GGG15 for 15% OFF
🚚 Free Shipping on First Order
🎁 TODAY SPECIAL OFFER: Order 2+. Use code GGG15 for 15% OFF
Explore the beauty of the floral world with high-quality seeds, making your...
You're 2 away from FREE E-book!
 30-Day Money-Back Guarantee
 Free Shipping & Free Returns
 Over 175,000+ Happy Customers

A MULTI-GRAFTED ROSE FIELD GUIDE
Choose the varieties. Add the buds. Keep the colors in balance.
A practical guide to planning, T-budding, and caring for a rose with several varieties. Introduced by Maya Collins.
Explore the guide
THE IDEA
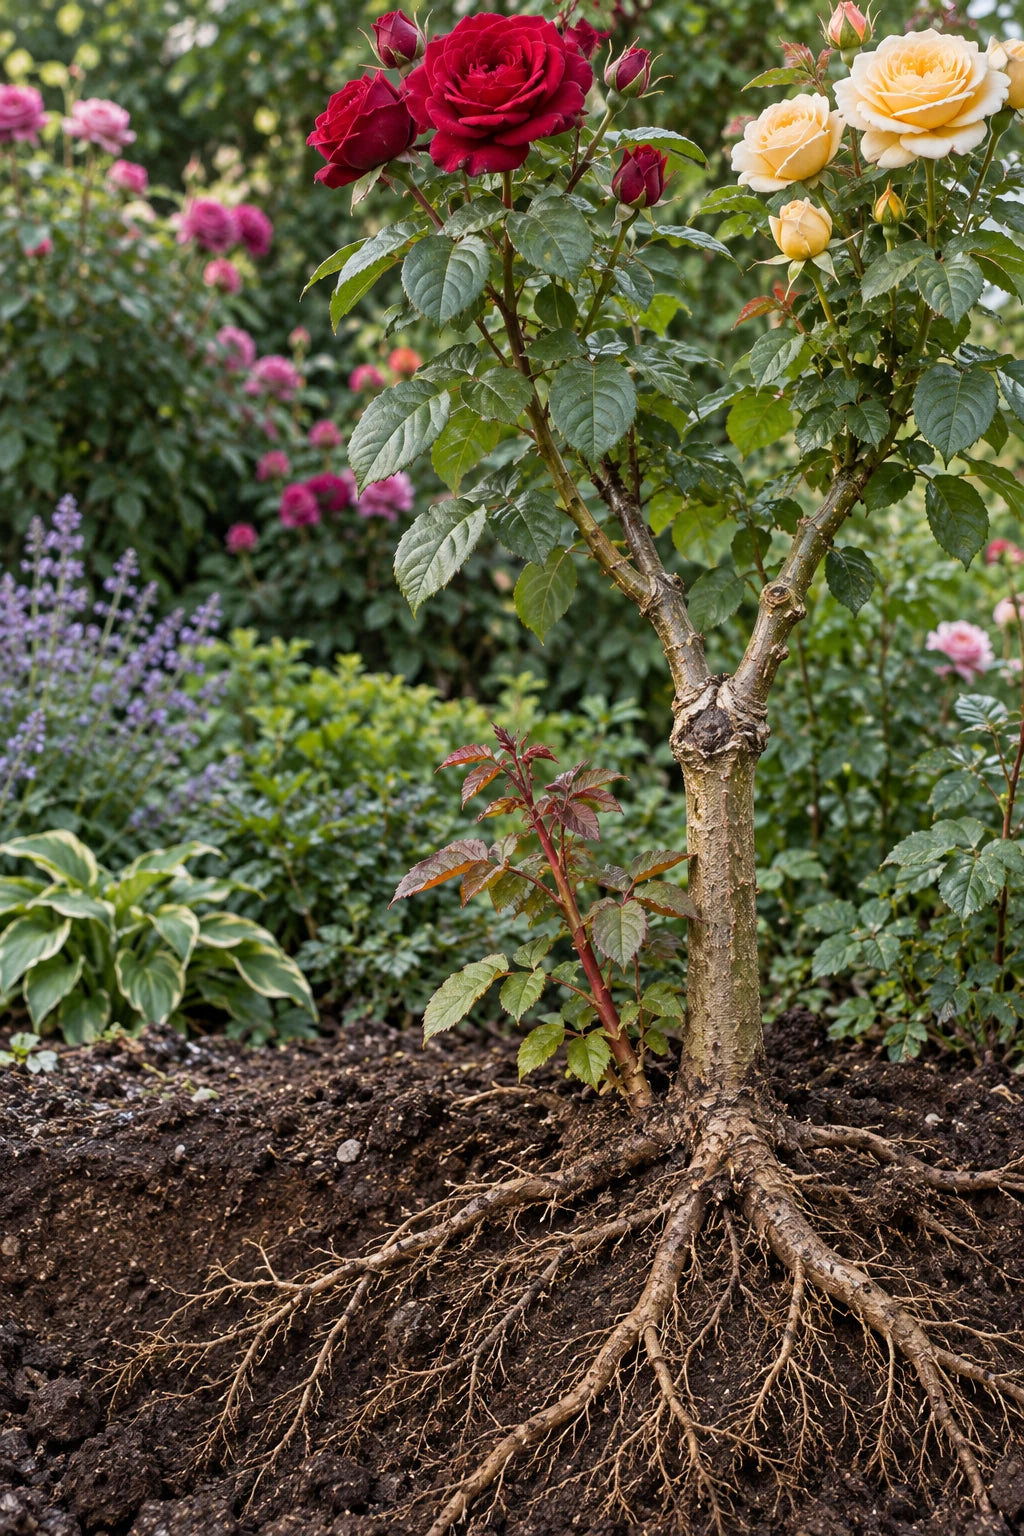
Yes, one rose can carry several cultivars. Each successful bud grows into its own branch, supported by the same root system.
Roots and supporting stems supply the chosen varieties.
Each bud comes from a named rose you want to keep.
Keep every variety in the light and watch its growth.
Red, pink, and yellow stay on their own branches. Grafting does not blend them into a new flower color.
THE LIVING PARTS
Growth above a successful bud union carries the chosen flower variety.
The healing connection between the selected bud and supporting plant.
Growth from below a union competes with the selected varieties.
Leaf shape, color, and thorn count vary. Trace a shoot back to where it begins.
BEFORE YOU ADD A VARIETY
Start with a healthy rose rootstock or framework. Choose cultivars that can share its growing conditions.
Use a rose rootstock suitable for your climate and chosen scions. A nursery can help confirm a workable combination.
Avoid diseased or stressed donor plants. Prepare a clean, sharp budding knife and label each cultivar.
Choose roses with similar sun, water, and climate needs. All branches share one root system and one care routine.
Compare mature habits. A much stronger variety will need more attention to avoid shading its neighbors.
THE GO / WAIT CHECK
T-budding needs active growth and bark that slips. If it tears or sticks, wait for better conditions instead of forcing the cut.
First attempt: practise on spare rose canes, then start with two selected varieties before managing three.
COLOR IS ONLY THE START

DESIGN BEFORE CUTTING
A clear branch map makes later pruning a decision, not a guess.

T-BUDDING / PREPARE
In temperate gardens, mid- to late summer is a common window. Work when the rose is growing and its bark lifts cleanly.
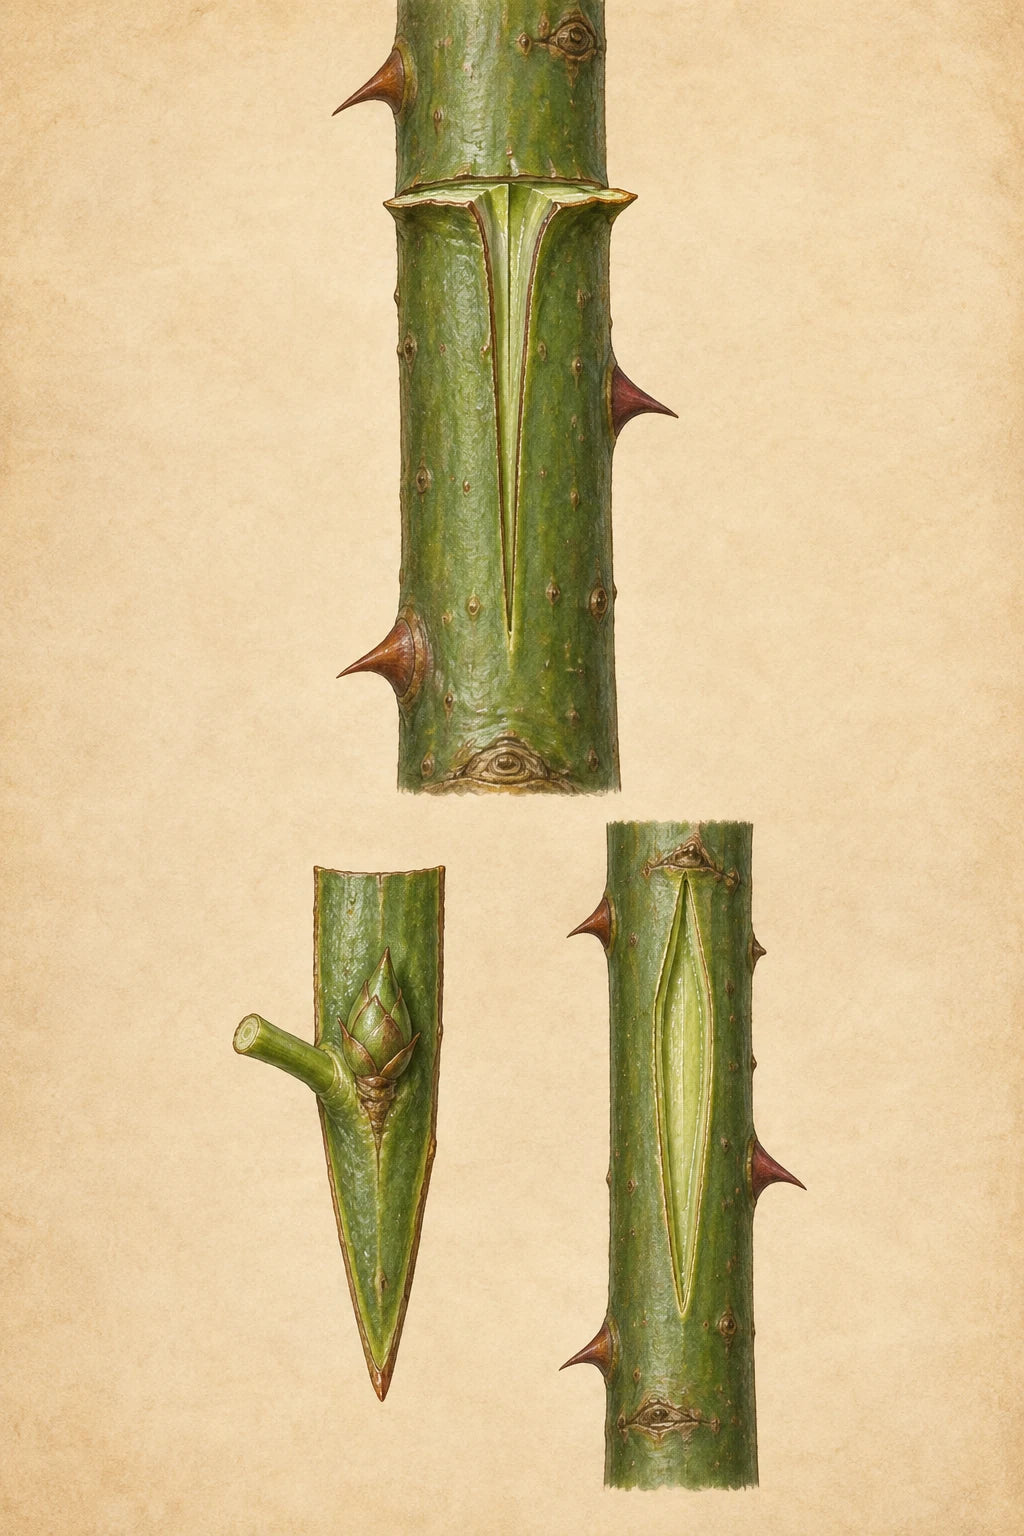
Choose a smooth, pencil-thick section of the rose framework, with room for the bud and binding.
Cut a 1 cm crosscut, then 2.5–4 cm down from its midpoint. Pierce the bark without cutting deeply into wood; gently lift both flaps.
Take a healthy growth bud from a ripened rose shoot. Leave a short leaf stalk as a handle. Slice beneath the bud to lift a narrow shield with a thin sliver of wood.
T-BUDDING / JOIN & ESTABLISH
A close fit keeps the living surfaces together. The new bud still needs to heal before it can support a shoot.
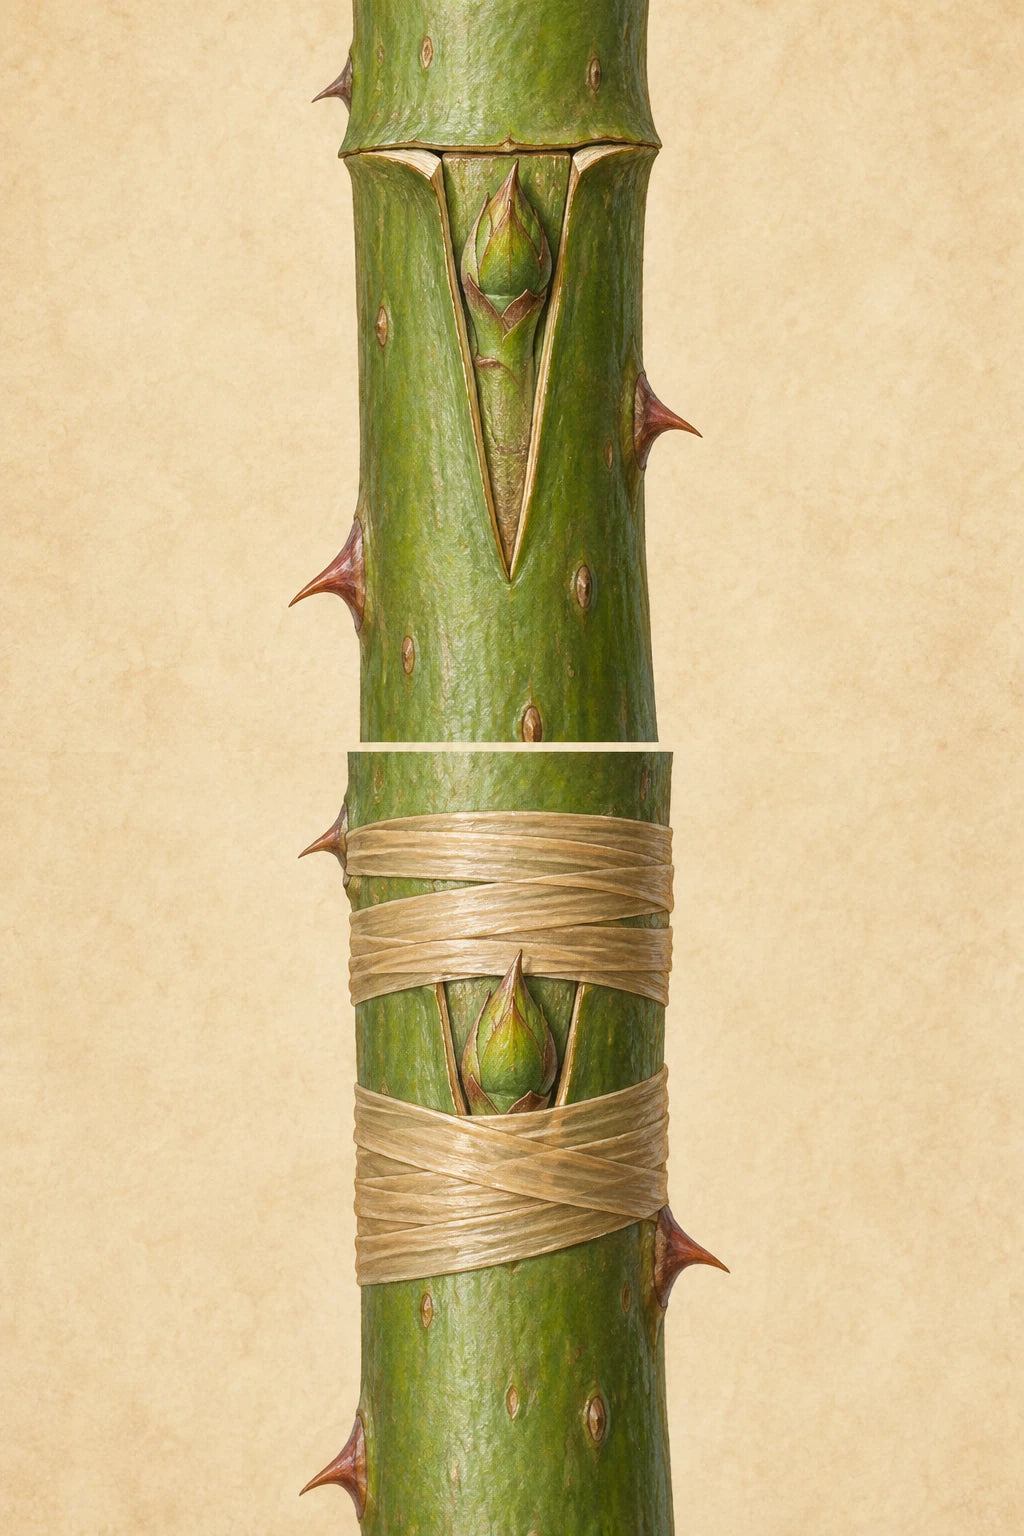
Hold the leaf-stalk handle. Slide the shield point-first beneath both flaps, bud upright. Trim its top flush with the crosscut.
Wrap budding rubber snugly above and below the eye, leaving it exposed. Close the flaps without crushing the cane. Label cultivar and date.
A firm, green bud and joined edges suggest a take; dark, shriveled tissue suggests failure. Remove non-degrading ties once healed, before constriction.
Late-summer buds may rest until spring. After healing, reduce the stock shoot above the bud at the suitable season. Preserve other cultivar branches.
THE MAIN CHALLENGE
Unequal vigor can turn a three-color plan into a one-color plant.
Compare extension growth and light access across all named branches.
Train young shoots outward so they do not cross or shade neighbors.
Shorten dominant growth gradually while preserving enough leaf area.

THE THREE-ACTION RULE
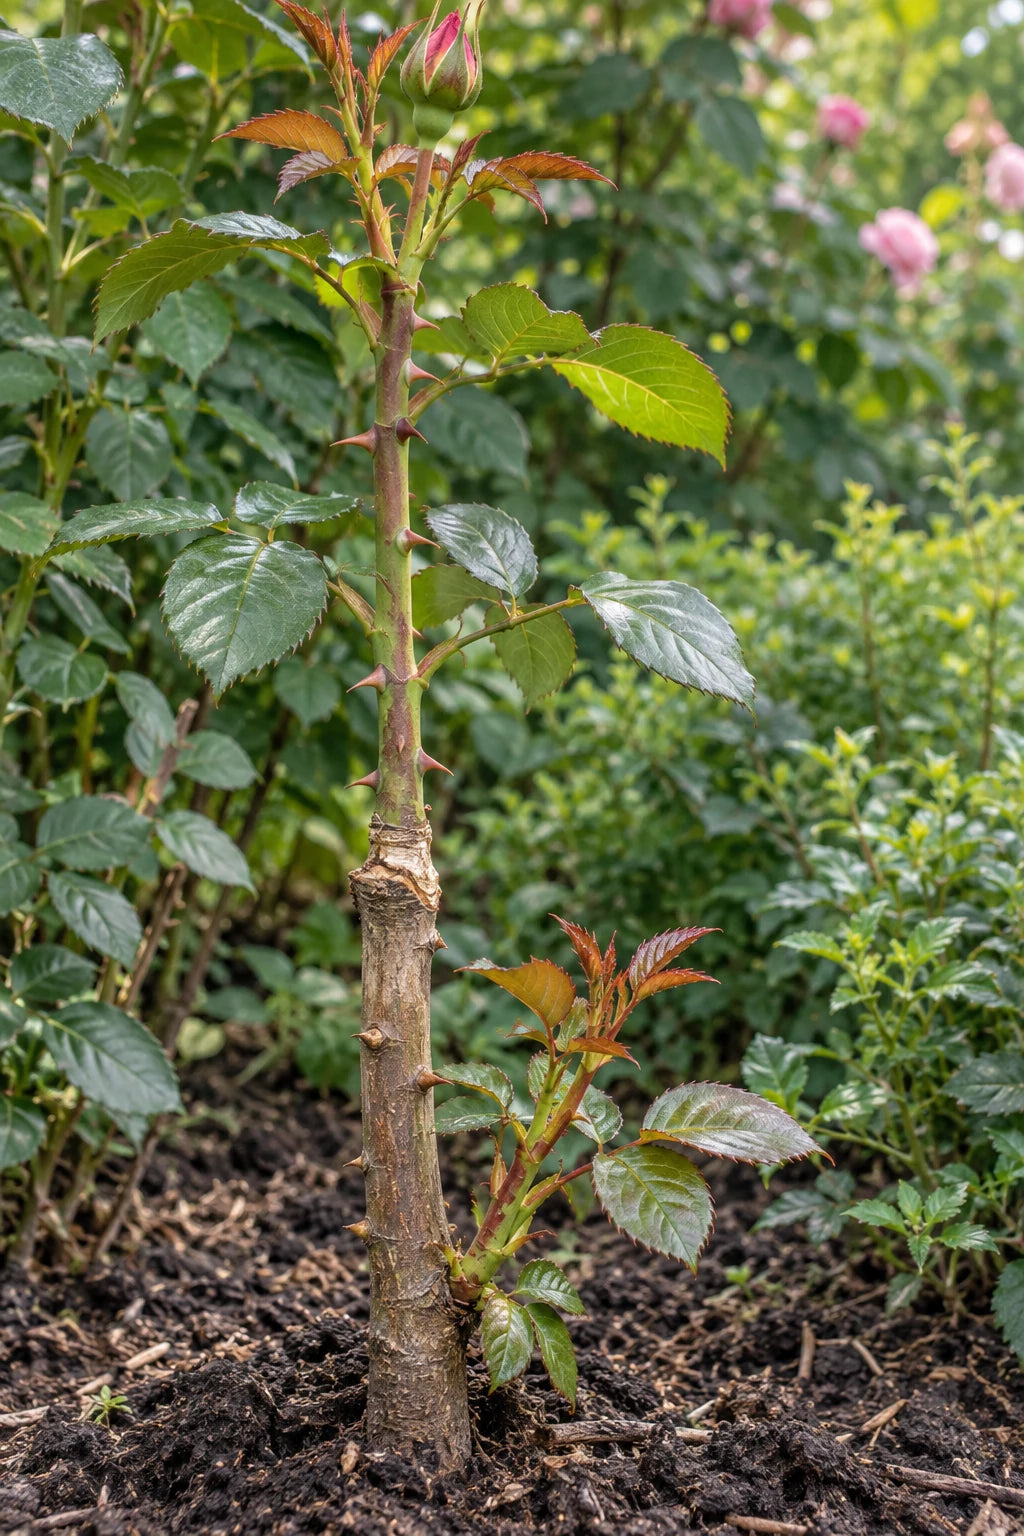
Find where the shoot starts. Leaf color and thorn count alone cannot identify a rootstock sucker.
 123
123
This shoot grows from the chosen bud. Keep it supported as it extends.
The connection links the selected variety to the stock. Avoid knocks and constricting ties.
This shoot starts below the union. Trace it to its origin and remove it cleanly.
Illustrative example: trace every shoot to its origin and check its label before pruning.
MAKE THE PLANT LEGIBLE
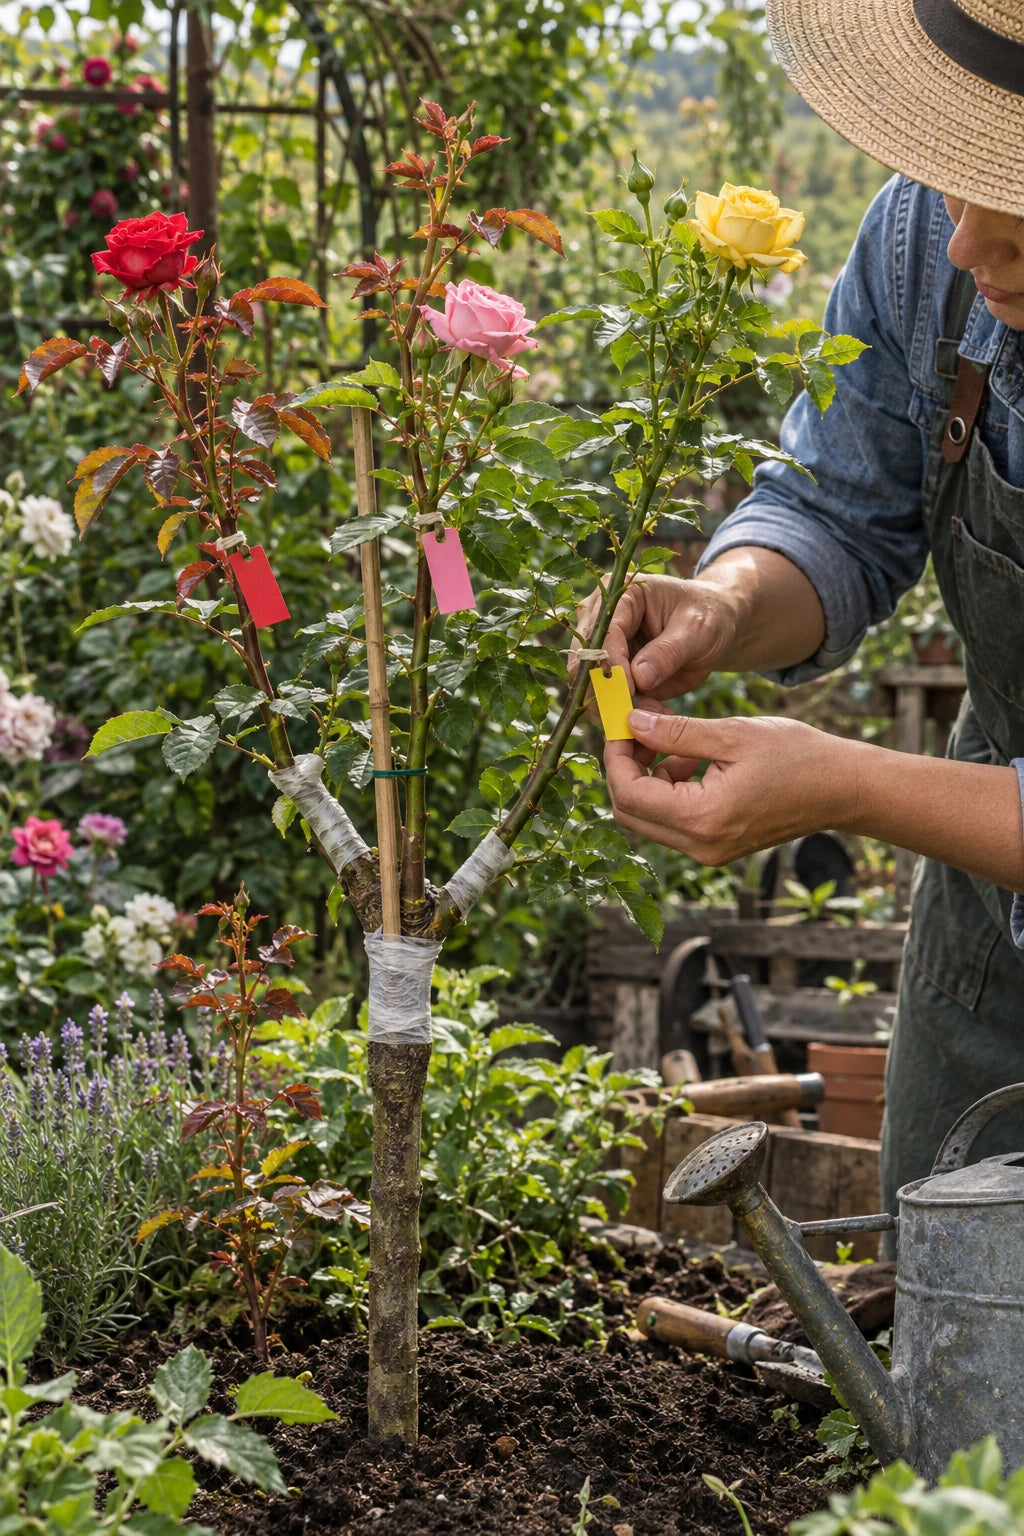
DIAGNOSE THE BRANCH
Usually, the branch carrying that cultivar weakened, died back, was removed, or became hidden while another scion—or the rootstock—took over.
Trace the surviving cane back to its exact point of origin.
Match the cane with your original branch map and photos.
A multi-grafted rose stays understandable only when every branch keeps its identity.
FIELD WORKSHEET
RECOMMENDED BY MAYA COLLINS
Growing your rose in a pot? Give the roots a mix that holds moisture and still drains well.
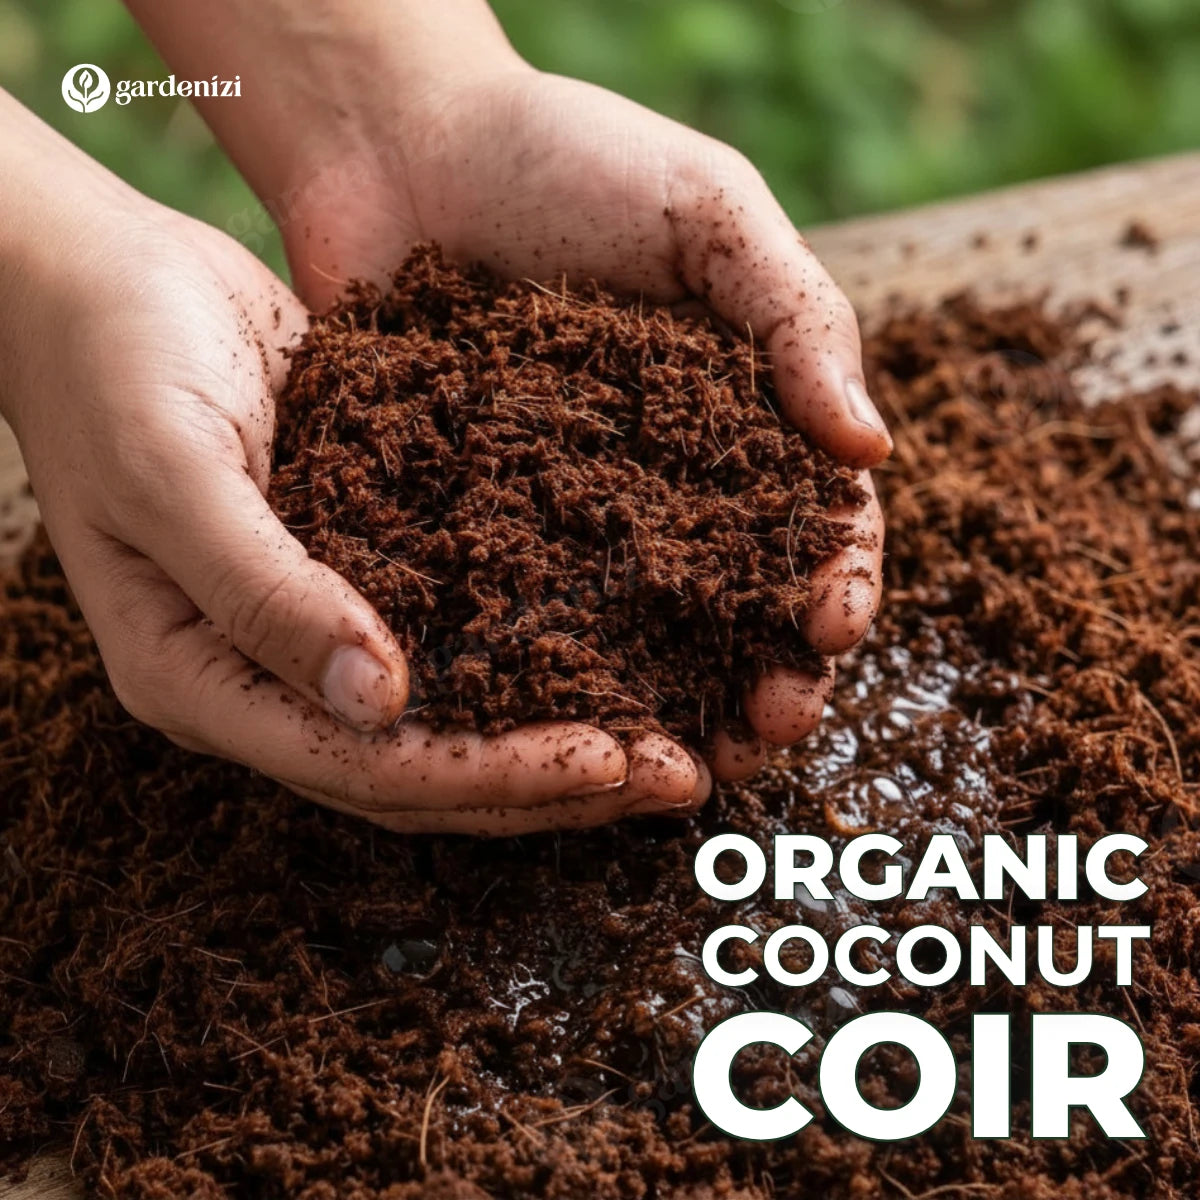
MAYA’S PICK FOR YOUR POTTING MIX
Maya recommends this coir as a moisture-retaining ingredient to blend into a potting mix for container-grown roses.
Hydrated coconut fiber helps the mix hold water.
Fluff the expanded coir, then blend it evenly into your mix.
A compressed brick is easy to keep until you are ready to hydrate it.
Recommended by Maya Collins. Product sold by Gardenizi.
FROM BRICK TO POTTING MIX
Use this approach when potting your rose. Let a newly grafted plant establish before disturbing its roots.
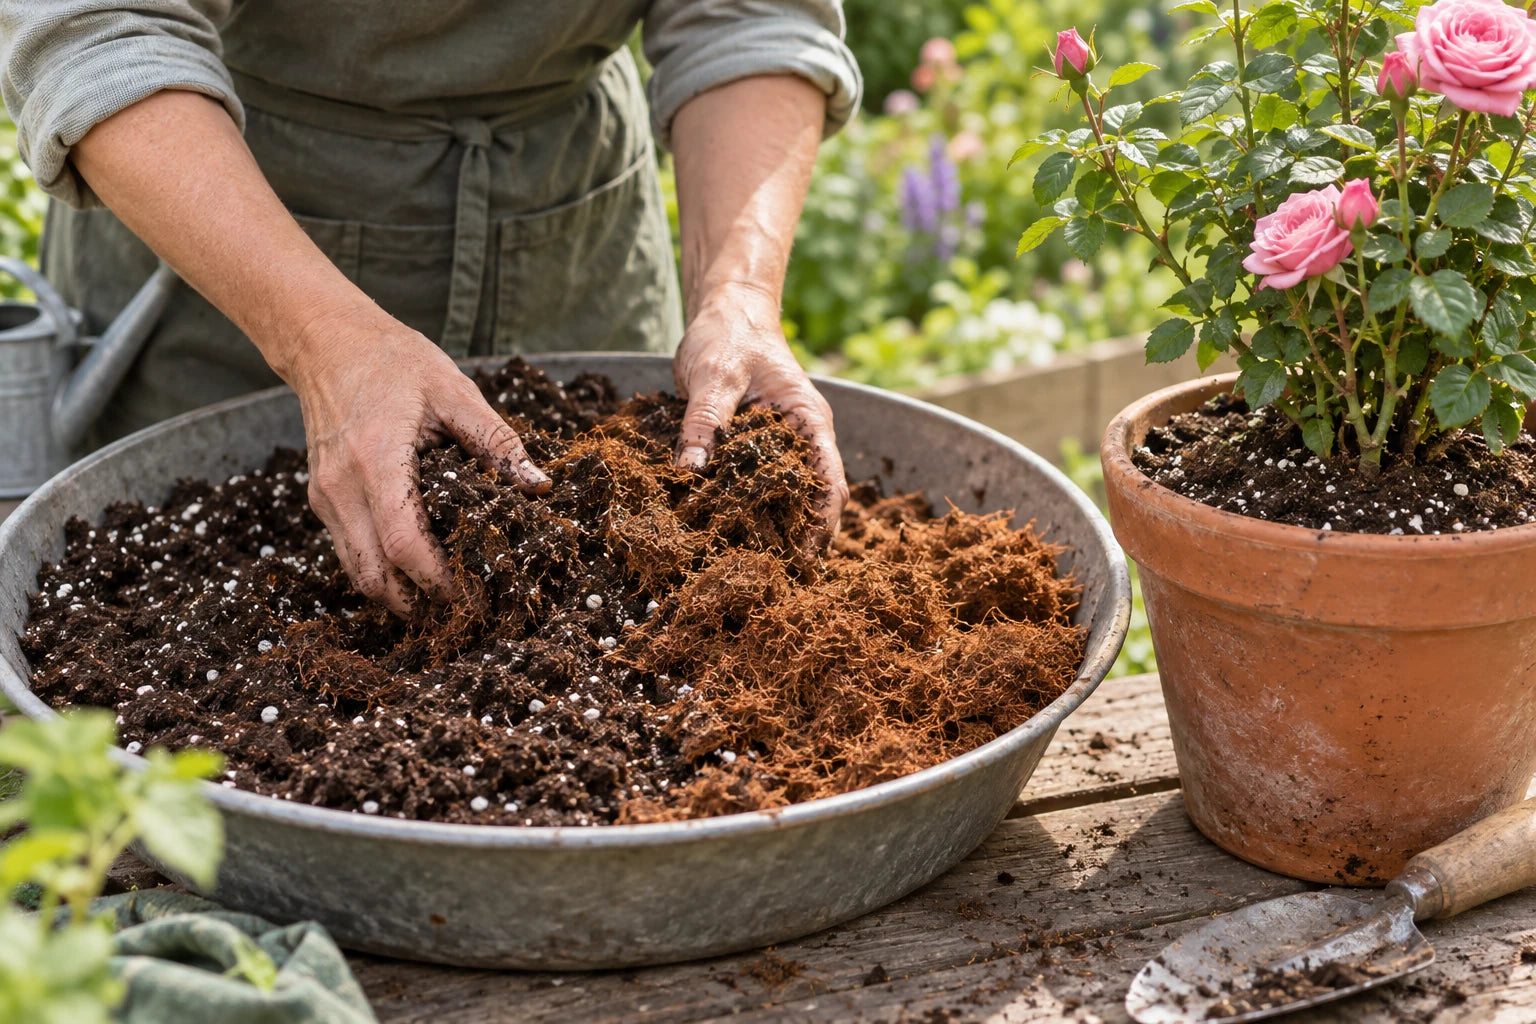
Put the brick in a roomy container. Add water following the product directions and let it expand.
Break up clumps, then blend the loose coir into a suitable rose potting mix. Follow the mix directions for proportions.
Use a pot with drainage holes. Water the mix, let excess drain, then check moisture before watering again.
Coir is a growing-medium ingredient, not a complete fertilizer. Keep up the rose’s feeding and graft aftercare; adding coir does not make a waterlogged pot safe.
A LITTLE CARE BELOW. MORE POSSIBILITY ABOVE.
 Scan to explore